More actions
No edit summary |
Encourage ed25519 |
||
| (21 intermediate revisions by 4 users not shown) | |||
| Line 1: | Line 1: | ||
== Welcome to Nest! == | == Welcome to Nest! == | ||
__NOEDITSECTION__ | |||
This guide will walk you through creating an account and setting up a [[Caddy]] webpage. It assumes basic knowledge about the terminal—read up on that on [[Linux]] if you're unsure! Also, please review the [[Acceptable Use Policy]] before getting started with Nest. | |||
=== | === Creating an Account === | ||
[[File:Nest Home Tab.png|thumb|The Home tab on the Quetzal application]] | |||
Before you are able to create an account, you must verify that you are a student. Please see [[verifying your student status]] for more details. You '''cannot''' proceed with the following steps without doing this. | |||
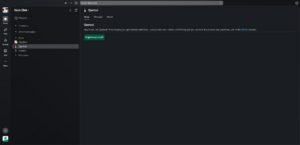
Now, on the [https://hackclub.com/slack Hack Club Slack], open the Quetzal (Nest's mascot) app by searching "Quetzal" in the search bar, and clicking on the Quetzal app. Then, click "Register yourself!" | |||
'''Warning:''' Your username cannot start with a number. Also, don't pick something like "admin" or "login" as a username. | |||
The signup flow will need some basic information—namely, your username, name, email address, and [[SSH]] key, which is how you will log into the Nest server. If you don't have an SSH key, no worries - you can make one now!<blockquote>On ChromeOS? You'll have to use ChromeOS' built-in Linux integration. Go to Settings, search "Linux", and follow the instructions to get it setup if you haven't already. Once you're done, open up the Linux terminal.</blockquote>Simply open up your terminal (such as Windows Powershell or the Terminal app on MacOS), and type: | |||
ssh-keygen -t ed25519 | |||
Answer the prompts (you can accept defaults by pressing Enter), and it will generate a key for you. To get it, type this on MacOS/Linux: | |||
cat ~/.ssh/id_ed25519.pub | |||
or this on Windows (replacing username with the name of your user on Windows): | |||
type C:\Users\username\.ssh\id_ed25519.pub | |||
Copy the value that this outputs, and paste it into the "Public SSH Key" field of the Nest signup form. | |||
Once you've completed the signup flow, Quetzal will tell you that your request is under review. Once you are approved, Quetzal will let you know, and give you your password. This is the password that you'll use to access Nest services through [[Authentik]]. It's a good idea to change this password - go ahead and login to Authentik at https://identity.hackclub.app and change your password by clicking on the settings gear in the top-right corner, and then clicking the "Change password" button. Change it to something secure! | |||
You can also link your Authentik account to your Slack account, if you wish. This will let you login to Authentik through your Slack account. To do this, simply go to the "Connected services" tab of the same settings page, and click the "Connect" button next to the Slack icon. | |||
=== Using the Account === | |||
Now you will have to log in over [[SSH]]. From your terminal, run | |||
$ ssh <username>@hackclub.app | |||
Replace <username> with your Nest username. You should see "Welcome to Nest!". If you see something like "Permission denied" instead, make sure you've spelled your Nest username correctly and have the SSH key that you used to sign up for Nest on your computer. | |||
and | Your website is in <code>~/pub/</code>, your [[Caddy#Caddyfile|Caddyfile]] (server configuration) in <code>~/Caddyfile</code>, and your website accessible at <code><username>.hackclub.app</code>. From here, you have multiple options to set up your website - Caddy will automatically serve whatever you put in <code>~/pub/</code>! If you'd like to learn more about Caddy and what it can do, check out the [[Caddy]] page. | ||
==== The Lazy Way™ ==== | |||
You are able to write your website straight from the terminal using your editor of choice. | |||
username@nest:~$ nano ~/pub/index.html | |||
==== Git ==== | |||
If you have your website on GitHub or GitLab, you can clone it after deleting the default index.html file: | |||
username@nest:~$ rm ~/pub/index.html | |||
username@nest:~$ git clone <git repo url> ~/pub/ | |||
You can setup a cronjob to pull changes daily if you don't want to pull manually. | |||
username@nest:~$ crontab -e | |||
0 0 * * * cd ~/pub && git pull origin main 2>~/git-error | |||
==== Uploading Files Over SCP ==== | |||
If you have a website locally, you can upload it to your server. On your local device, run | |||
$ tar cvf website.tar /path/to/website | |||
$ scp website.tar <username>@hackclub.app:/home/<username>/pub | |||
Then over SSH, navigate to pub and use | |||
username@nest:~/pub$ tar xvf website.tar | |||
==== Uploading Files Over Croc ==== | |||
[https://schollz.com/tinker/croc6/ Croc] is a fast & simple tool for uploading files to remote machines. Install it on your local machine, zip up your files, and run | |||
$ croc [zip file] | |||
Then over SSH, navigate to pub and run | |||
$ croc [recieve-code-from-local-machine] | |||
to download the zip! | |||
You can then run on the pub | |||
$ unzip [zip file] | |||
to unzip your folder! | |||
==== Not a website? No problem! ==== | |||
Since Nest is just a normal Linux server, you can host pretty much anything on it, from Slack/Discord bots to complex full-stack apps. See [[Caddy#Reverse Proxy|Caddy]] for how to reverse proxy (forward) your subdomain to your app, and [[Systemd]] for how to keep it running! | |||
=== | |||
[[ | |||
Latest revision as of 09:27, 24 November 2024
Welcome to Nest!
This guide will walk you through creating an account and setting up a Caddy webpage. It assumes basic knowledge about the terminal—read up on that on Linux if you're unsure! Also, please review the Acceptable Use Policy before getting started with Nest.
Creating an Account

Before you are able to create an account, you must verify that you are a student. Please see verifying your student status for more details. You cannot proceed with the following steps without doing this.
Now, on the Hack Club Slack, open the Quetzal (Nest's mascot) app by searching "Quetzal" in the search bar, and clicking on the Quetzal app. Then, click "Register yourself!"
Warning: Your username cannot start with a number. Also, don't pick something like "admin" or "login" as a username.
The signup flow will need some basic information—namely, your username, name, email address, and SSH key, which is how you will log into the Nest server. If you don't have an SSH key, no worries - you can make one now!
On ChromeOS? You'll have to use ChromeOS' built-in Linux integration. Go to Settings, search "Linux", and follow the instructions to get it setup if you haven't already. Once you're done, open up the Linux terminal.
Simply open up your terminal (such as Windows Powershell or the Terminal app on MacOS), and type:
ssh-keygen -t ed25519
Answer the prompts (you can accept defaults by pressing Enter), and it will generate a key for you. To get it, type this on MacOS/Linux:
cat ~/.ssh/id_ed25519.pub
or this on Windows (replacing username with the name of your user on Windows):
type C:\Users\username\.ssh\id_ed25519.pub
Copy the value that this outputs, and paste it into the "Public SSH Key" field of the Nest signup form.
Once you've completed the signup flow, Quetzal will tell you that your request is under review. Once you are approved, Quetzal will let you know, and give you your password. This is the password that you'll use to access Nest services through Authentik. It's a good idea to change this password - go ahead and login to Authentik at https://identity.hackclub.app and change your password by clicking on the settings gear in the top-right corner, and then clicking the "Change password" button. Change it to something secure!
You can also link your Authentik account to your Slack account, if you wish. This will let you login to Authentik through your Slack account. To do this, simply go to the "Connected services" tab of the same settings page, and click the "Connect" button next to the Slack icon.
Using the Account
Now you will have to log in over SSH. From your terminal, run
$ ssh <username>@hackclub.app
Replace <username> with your Nest username. You should see "Welcome to Nest!". If you see something like "Permission denied" instead, make sure you've spelled your Nest username correctly and have the SSH key that you used to sign up for Nest on your computer.
Your website is in ~/pub/, your Caddyfile (server configuration) in ~/Caddyfile, and your website accessible at <username>.hackclub.app. From here, you have multiple options to set up your website - Caddy will automatically serve whatever you put in ~/pub/! If you'd like to learn more about Caddy and what it can do, check out the Caddy page.
The Lazy Way™
You are able to write your website straight from the terminal using your editor of choice.
username@nest:~$ nano ~/pub/index.html
Git
If you have your website on GitHub or GitLab, you can clone it after deleting the default index.html file:
username@nest:~$ rm ~/pub/index.html
username@nest:~$ git clone <git repo url> ~/pub/
You can setup a cronjob to pull changes daily if you don't want to pull manually.
  username@nest:~$ crontab -e
  0 0 * * * cd ~/pub && git pull origin main 2>~/git-error
Uploading Files Over SCP
If you have a website locally, you can upload it to your server. On your local device, run
  $ tar cvf website.tar /path/to/website
  $ scp website.tar <username>@hackclub.app:/home/<username>/pub
Then over SSH, navigate to pub and use
username@nest:~/pub$ tar xvf website.tar
Uploading Files Over Croc
Croc is a fast & simple tool for uploading files to remote machines. Install it on your local machine, zip up your files, and run
$ croc [zip file]
Then over SSH, navigate to pub and run
$ croc [recieve-code-from-local-machine]
to download the zip!
You can then run on the pub
$ unzip [zip file]
to unzip your folder!
Not a website? No problem!
Since Nest is just a normal Linux server, you can host pretty much anything on it, from Slack/Discord bots to complex full-stack apps. See Caddy for how to reverse proxy (forward) your subdomain to your app, and Systemd for how to keep it running!

